Stretches for PlumBand
For such a simple and compact item, the PlumBand enables a surprising breadth and depth of stretch and strength training. The stretches below will give you a start, but really the limit is your own ingenuity. Let us know how these stretches work for you. And if you invent your own, tell us about it using the hashtag #dancewithplum.
Stretch #1: Seated Leg
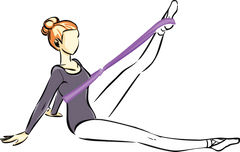
Sit with both legs straight in front of you, loop your
PlumBand around your body and through itself (A), then make the band
snug around your waist. Bend the knee of the leg you are stretching
and place the loose end of the band around the arch of that foot.
Extend the leg until straight and lift it up while leaning back and
supporting yourself with your arms.
Stretch #2: Seated Leg
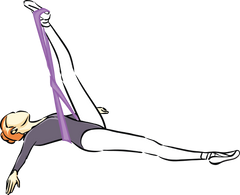
Prepare and position yourself as you would for Seated Leg
(stretch no. 1), then continue lying back with your leg straight up in
front of you. Allow your PlumBand to pull your leg back and down to
stretch and hold for 10–15 seconds. To increase the stretch, grasp the
band with your hands and gently pull towards your chest.
Stretch #3: Foot
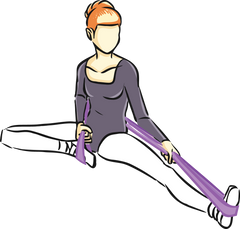
Sit
on the floor with your legs in the butterfly position. Place your
PlumBand against the flat of your back and then loop each of its ends
around the balls of your feet. Extend the leg of the foot you intend
to stretch until the leg is straight. Then, using the hand on your
stretching side, grasp your band firmly and pull to stretch the foot.
Stretch #4: Quad
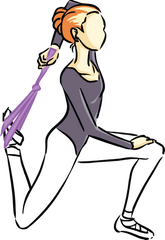
Tie
your PlumBand into an overhand knot (A). Then, while kneeling, place
the loop around the bridge of the foot on the leg you want to stretch.
Grip the band over your shoulder using the hand opposite the
stretching leg, and pull up as you lean forward and raise your
opposite knee in front of you. Keep resistance on the stretching leg
as it moves up and down. Repeat several times with each leg.
Stretch #5: Back
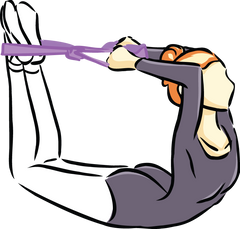
Tie
your PlumBand into an overhand knot (A). While lying on your stomach,
put the large loop of the knot around both of your feet. Reach back
and grab an end of the band with each of your hands. Pull slowly to
bring your head and feet together and gently rock back and forth to
stretch your back.
Stretch #6: Advanced Back
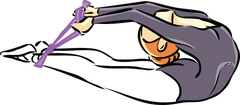
Prepare and position yourself as you would for Back (stretch
no. 5), then extend your legs to pull your upper body back and
increase the stretch of your back. At the full extent of the stretch,
your legs will be fully straight. When releasing the stretch, slowly
relax your back.
This is an advanced stretch that is not for everyone. Know your
limits, and remember to never continue a stretch to the point of
discomfort or pain.
Stretch #7: Middle Split
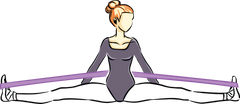
While sitting on the floor with your legs in the butterfly
position, loop one end of your PlumBand around the arch of one of your
feet. Then pull the band around your back and loop the other end
around the arch of your other foot. Slowly extend your legs forward
until straight, and then move them out to the sides into the middle
split position. Point your toes for an additional stretch.
Stretch #8: Middle Split

Prepare and position yourself as you would for Middle Split
(stretch no. 7), then with your legs in the middle split position,
lean forward onto your stomach while pushing your hips towards the
ground. Flex your feet and point your toes for an additional stretch.
Stretch #9: Middle Split
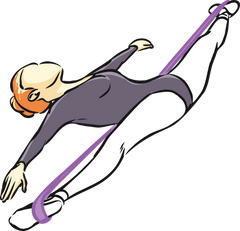
Prepare and position yourself as you would for Middle Split
(stretch no. 7), then with your legs in the middle split position,
lean backwards to lie flat on your back while keeping your legs in the
split position. Flex your feet and point your toes for an additional
stretch.
Stretch #10: Middle Split
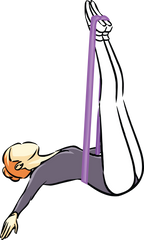
Prepare and position yourself as you would for Middle Split
(stretch no. 9), then while lying on your back with your legs in the
split position, slowly raise your legs to point straight up and then
return them down to the split position. Repeat to strengthen your
stomach, groin and core muscles.
Stretch #11: Side
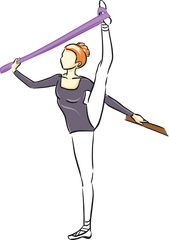
While standing near a barre or chair for support, step onto
your PlumBand with a foot and wrap the band once around its arch and
bridge. Grasp the other end of the band using the hand opposite the
leg you are stretching, then slowly lift your leg up and to the side
as you pull. Raise your leg as high as you can without pain, hold for
a moment, and then return it to the ground.
Stretch #12: Side
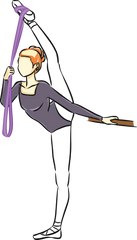
Prepare and position yourself as you would for Side Split
(stretch no. 11). Grasp the end of the band using the hand opposite
the leg you are stretching, then slowly lift your leg up and to the
side as you pull. Continue to pull your leg up and over towards the
opposite side of your body. Raise your leg as high as you can without
pain, hold for a moment, and then return it to the ground.
Stretch #13: Arabesque
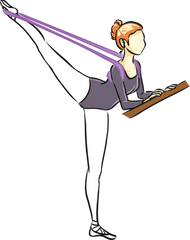
Step into the circle of your PlumBand and flip the forward
portion up and over your head, tucking the band under your arms and
across your upper back. While using a barre or chair for support, bend
a leg behind you, then place the end of the band over the bridge of
that leg’s foot. Carefully extend your leg up into an arabesque
position. From this stretch position, you can easily move between
arabesque, attitude, and penché positions.
Stretch #14: Attitude
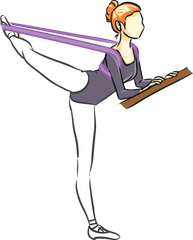
Prepare and position yourself as you would for Arabesque
(stretch no. 13). While using a barre or chair for support, bend a leg
behind you, then place the end of the band over the bridge of that
leg’s foot. Carefully extend your leg up into an attitude position.
From this stretch position, you can easily move between attitude,
arabesque, and penché positions.
Stretch #15: Penché
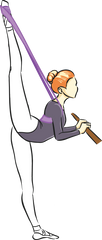
Prepare and position yourself as you would for Arabesque
(stretch no. 13). While using a barre or chair for support, bend a leg
behind you, then place the end of the band over the bridge of that
leg’s foot. Extend your leg up into first an attitude or arabesque
position, then lean forward into a penché position. From this stretch
position, you can easily move between penché, attitude, and arabesque
positions.
PlumBand Knots
The instructions above reference two different knots with your PlumBand. (A) is on the left, and (B) is on the right.

